To install drip irrigation, connect a tap timer and pressure-reducing fitting at the outdoor tap, run 13mm poly pipe along your beds, punch in 4mm barbed drippers or micro-tubing at each plant, then flush and cap the line before testing. Most home gardens take a single weekend and only basic hand tools.
Learning how to install drip irrigation is one of the highest-value jobs you can do in the garden. It delivers water straight to the root zone, cuts evaporation, keeps foliage dry (which reduces fungal problems), and frees you from standing there with a hose. Below is the exact order we'd tackle it in.
What you'll need before you start
Drip systems are modular, so gather your parts before you touch the tap. A typical home kit for a few beds includes the items below, most of which sit in our lawn and garden watering range.
- Tap timer or controller so watering happens automatically, even when you're away.
- Pressure reducer (usually 100-200 kPa) — drip line runs at low pressure and mains pressure will blow fittings off.
- 13mm poly pipe as your main supply line, plus elbows, tees and end caps.
- 4mm micro-tubing and drippers for individual plants and pots.
- A hole punch, poly pipe cutter (or sharp secateurs) and a filter to keep grit out of the emitters.
If you want set-and-forget scheduling for several zones at once, a unit like the Holman WX4 four-outlet Wi-Fi tap timer lets you run beds, pots and the veggie patch on separate programs from your phone.
Step 1: Plan your layout
Sketch the beds and mark every plant or pot that needs water. Group thirsty plants together where you can, because they'll share a watering time. Note the distance from the tap so you buy enough 13mm poly pipe, and add a metre or two for slack.
Decide where the main line will run — ideally along the back or centre of each bed so branches reach both sides. Keep total run length sensible; very long single runs lose pressure at the far end.
Step 2: Set up the tap connection
Screw the tap timer onto the outdoor tap, then add the filter and the pressure reducer in that order, working away from the tap. This sequence protects your emitters from grit and keeps pressure in the drip-friendly range.
Finish with a threaded-to-poly adaptor so your 13mm pipe clicks or screws straight on. Hand-tight is usually enough — over-tightening plastic threads cracks them.
A quick note on water pressure
If your emitters keep popping off or misting instead of dripping, pressure is almost always the culprit. Fitting a reducer solves it, and pressure-compensating drippers help keep flow even across sloping or long beds.
Step 3: Lay the main poly pipe
Roll the 13mm pipe out in the sun for ten minutes first — warm pipe is far easier to bend and push onto fittings. Lay it along your planned route, using tees to branch and elbows to turn corners.
Pin it down every metre or so with garden stakes or saddles so it doesn't lift when pressurised. Leave the far end open for now; you'll flush it before capping.
Step 4: Add drippers and micro-tubing
This is where how to install drip irrigation becomes genuinely satisfying. At each plant, punch a hole in the 13mm pipe and press in a barbed dripper, or run a length of 4mm micro-tubing to a pot and finish it with an adjustable dripper.
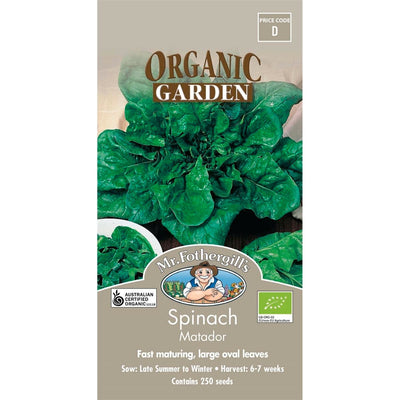
Match the emitter to the plant: 2 litre-per-hour drippers for small plants and pots, 4 or 8 L/hr for shrubs and hungry vegetables. For rows of seedlings such as fast-maturing Mr Fothergill's Spinach Matador, in-line drip tubing with evenly spaced emitters waters the whole row at once.
Step 5: Flush, cap and test
Before you seal anything, run the tap for a minute with the end open. This flushes out plastic shavings and grit that would otherwise clog your drippers on day one.
Now fit the end cap or a flush valve, turn the system on, and walk the whole run. Check every dripper is flowing, look for leaks at each fitting, and adjust any emitters that are running too fast or too slow.
Step 6: Set the timer and mulch
Program the controller for early morning, when evaporation is lowest and plants can drink before the heat. Start with short, frequent cycles and adjust as you watch the soil — deep, less-frequent watering encourages stronger roots once plants establish.
Finish by spreading mulch over the pipe. It hides the tubing, holds moisture in, and keeps the poly pipe out of harsh UV so it lasts for years. You'll find mulch, stakes and accessories across our garden and outdoor section.
Common mistakes to avoid
- Skipping the pressure reducer — the number one cause of blown fittings and failed drippers.
- No filter — grit clogs emitters and the whole system waters unevenly.
- Runs that are too long — pressure drops off and the last plants go thirsty.
- Forgetting to flush — plastic shavings block new drippers within days.
- Leaving pipe exposed to UV — mulch or bury it so it doesn't go brittle.
Feeding the soil under your new system
Drip irrigation keeps moisture consistent, which is exactly the environment soil life loves. Improving the soil biology under your beds means those steady drips feed a living root zone rather than compacted dirt.
A living soil booster such as the odourless Worm Affair live worm booster aerates the soil and improves how water moves through it, so your new drippers work even harder. Add plenty of organic matter and let the worms and the water do the rest.
Frequently asked questions
How long does it take to install drip irrigation?
Most home gardens with a few beds take one weekend. Planning and laying the main poly pipe is quick; the fiddly part is punching in individual drippers and micro-tubing. A single large bed can be done in an afternoon once you have all the parts on hand.
Do I need a pressure reducer for drip irrigation?
Yes. Drip systems run at low pressure, and full mains pressure will pop fittings off and cause emitters to mist instead of drip. Fit a pressure reducer (commonly 100-200 kPa) straight after the tap timer and filter. It is the single most important fitting for a reliable, leak-free system.
How often should a drip irrigation system run?
Start with short daily cycles while plants establish, then shift to longer, less-frequent watering to encourage deep roots. Early morning is best, as evaporation is lowest. Watch the soil rather than the clock, and adjust for season, plant type and rainfall. Pots dry faster and usually need more frequent runs.
Can I install drip irrigation myself without a plumber?
Absolutely. Drip irrigation connects to an existing outdoor garden tap and uses push-fit and barbed fittings, so no plumbing licence or permanent pipework is required. If you want to tap into mains plumbing or add a new tap, that part is a licensed plumber's job, but the garden system itself is a DIY weekend project.