Learning how to replace a shower head is one of the easiest plumbing jobs you can do at home, and it usually takes about 10 minutes with no plumber required. You simply unscrew the old head from the wall arm, clean the threads, wrap fresh thread tape and screw on the new one hand-tight. Most standard shower heads in Australia share the same universal fitting, so a swap is genuinely straightforward.
Do you need a plumber to change a shower head?
For a straight like-for-like swap onto an existing wall arm, no. Changing the head itself is not classed as regulated plumbing work because you are not altering pipework or water connections behind the wall.
You would only need a licensed plumber if you plan to move or extend the pipe, change to a rail shower that taps into the wall, or fix a leak coming from inside the wall rather than the head. If it screws on and off the visible arm, it is a DIY job.
What you'll need
The beauty of this job is how little kit it takes. Gather everything first so you are not dripping across the house mid-swap.
- Your new shower head - check it has a standard 15mm (1/2 inch) BSP female fitting, which suits almost all Australian wall arms.
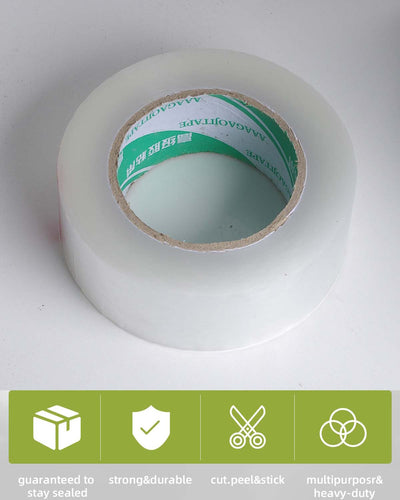
- Thread seal tape (plumber's tape or PTFE tape) to seal the threads and stop drips.
- An adjustable spanner or shifter, plus a soft cloth to protect the chrome finish.
- A pair of disposable gloves - a box of Vileda Ansell WORKmates latex gloves keeps your hands clean and gives you extra grip on a slippery wet fitting.
- An old toothbrush and some white vinegar for cleaning gunk off the threads.
You will find these odds and ends alongside a wider bathroom plumbing range if you are missing anything before you start. It is worth having a spare roll of thread tape on hand for future jobs too.
How to replace a shower head step by step
1. Turn off the shower and protect the area
You do not usually need to shut off the mains for a head swap, just make sure the taps are firmly off. Lay a towel in the shower base to catch any drips and to cushion the head if you drop it.
A little water will trickle out of the arm when you remove the old head, so this is normal. Slip your gloves on now for grip.
2. Unscrew the old shower head
Grip the old head and turn it anticlockwise by hand. Most will loosen with firm hand pressure once the seal breaks.
If it is stuck fast with age or limescale, wrap a cloth around the fitting to protect the chrome, then use your shifter for extra leverage. Turn slowly and steadily rather than yanking, so you do not twist the wall arm.
3. Clean the wall arm threads
With the old head off, you will see the threaded end of the wall arm. Peel away any old, tattered thread tape and scrub the threads with your toothbrush and a dab of vinegar to shift built-up mineral scale.
Clean threads are the secret to a leak-free seal. Wipe them dry with your cloth before moving on.
4. Wrap fresh thread tape
Hold the tape against the wall arm threads and wrap it clockwise (the same direction the head screws on) so it does not unravel as you fit the head. Three to four neat wraps is plenty.
Press the tape into the thread grooves with your fingers. Wrapping the wrong way is the most common reason a fresh head still weeps, so take your time here.
5. Screw on the new shower head
Thread the new head onto the arm by hand, turning clockwise. It should spin on smoothly - if it binds or crosses, back it off and start again to avoid stripping the thread.
Hand-tight is usually enough. If you want a touch more, give it a gentle nip with the shifter over a cloth, but do not over-tighten or you can crack the fitting.
6. Test for leaks
Turn the shower on and let it run for a minute. Check around the joint where the head meets the arm for any drips or spray.
A dry joint means you are done. If you spot a weep, turn off, unscrew, add an extra wrap or two of tape and refit.
Common mistakes to avoid
Most failed shower head swaps come down to a handful of easily avoided slips. Keep these in mind and you will get a clean seal first go.
- Wrapping thread tape the wrong way so it peels off as you fit the head - always wrap in the direction the head screws on.
- Over-tightening with a spanner, which can crack plastic fittings or damage the wall arm. Hand-tight plus a gentle nip is the sweet spot.
- Skipping the thread clean - old tape and scale stop the new seal from seating properly.
- Forgetting to check the fitting size before you buy. A quick measure saves a return trip.
Keep your new shower head running clear
Once fitted, a little upkeep keeps the flow strong. Hard water leaves mineral deposits that block the nozzles over time, which is the same scale that clouds up kettles and tap filters.
Every few months, unscrew the head and soak it in warm white vinegar for an hour to dissolve the build-up, then brush the nozzles clear. If your water quality is your real gripe, the same minerals are worth tackling at the tap with a filter like the BRITA On Tap Pro V-MF refill or an inline Aquaport 600L replacement cartridge for cleaner drinking water elsewhere in the house.
While you have the tools out, it is a good moment to look at other quick wins around the room. Refreshing your home and living essentials - from tidy storage to better lighting - makes the whole bathroom feel newer without a full renovation.
Frequently asked questions
How long does it take to replace a shower head?
For a straightforward like-for-like swap, expect about 10 minutes. Most of that is cleaning the threads and wrapping fresh thread tape. If the old head is seized with limescale it can take a little longer to work loose, but the job itself stays simple and tool-light.
Do all shower heads fit the same wall arm?
Almost all shower heads in Australia use a standard 15mm (1/2 inch) BSP fitting, so most swap onto an existing wall arm without an adapter. It is still worth a quick measure or a glance at the product specs before you buy, especially for imported or specialty designs.
Why is my new shower head still leaking after I fitted it?
The usual culprit is thread tape wrapped the wrong way or not enough of it, so the seal cannot seat. Unscrew the head, wrap three to four clockwise turns of fresh tape in the direction the head tightens, then refit hand-tight. Cracked or over-tightened fittings can also weep.
Do I need to turn off the water to change a shower head?
Not usually. As long as the shower taps are firmly closed, only a small amount of trapped water will trickle from the wall arm when you remove the old head. Lay a towel in the base to catch drips. You only need the mains off if you are altering pipework.